repair

LED fairy lights repair

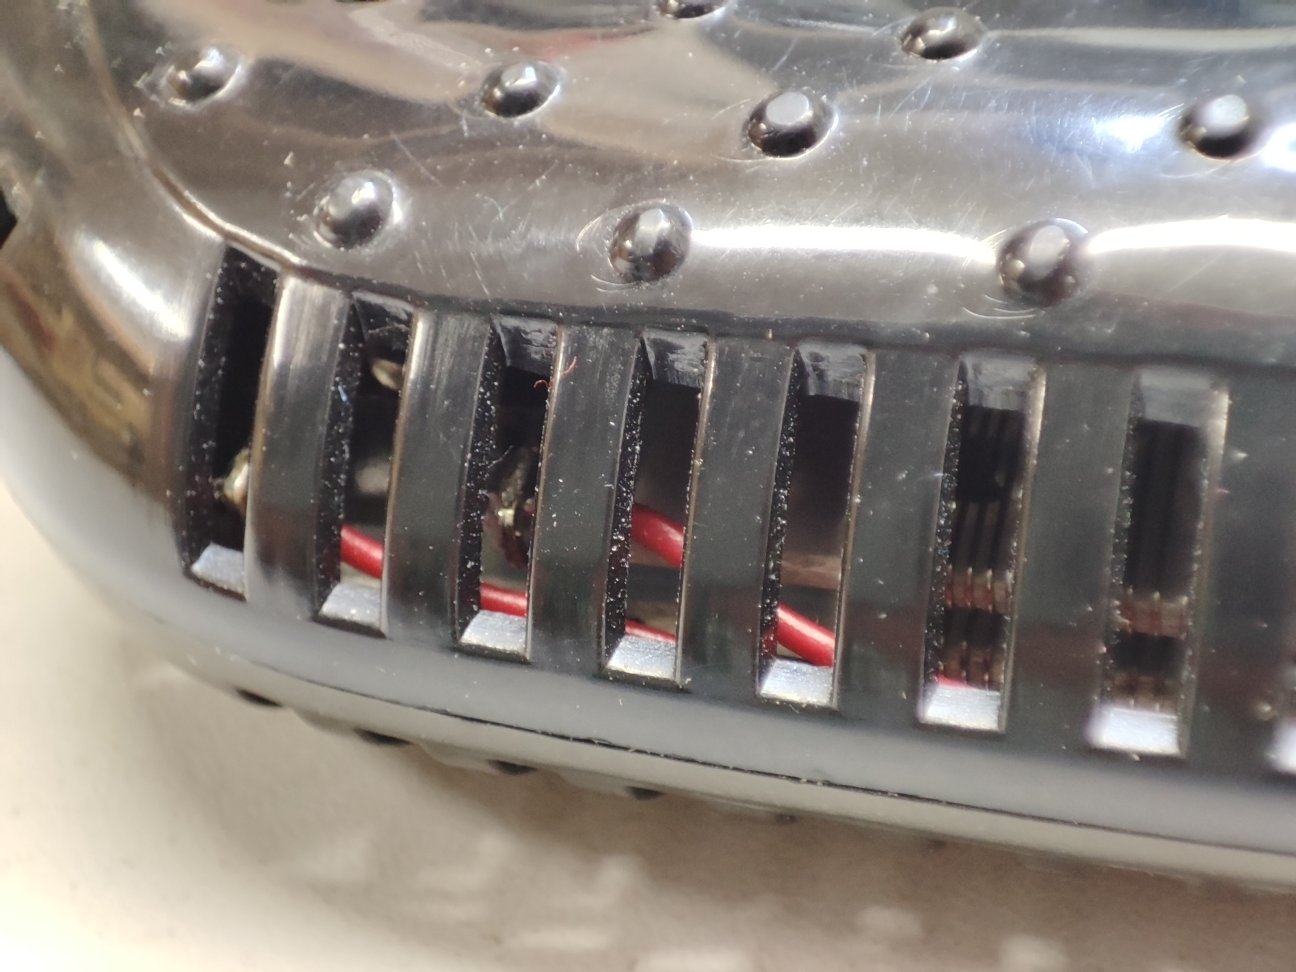
Today I had a fairy light with 200 LEDs in the lab, where some of the LEDs did not work anymore. So the first thing was to find out how the LEDs are wired – I saw that throughout the whole fairy lights, sometimes there were two wires in parallel and sometimes there were three wires. I checked how they are connected, and found that the LEDs are wired in a combination of serial and parallel connections:

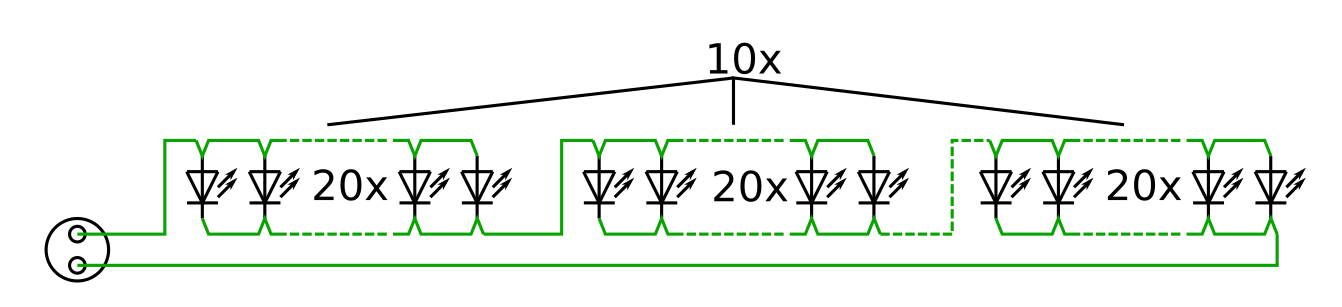
There are 10 groups of LEDs, and all the groups are wired serial one after the other. In each group, there are 20 LEDs which are connected parallel. This also makes it clear why there are segments where only two wires are required (the connections between each of the groups) and segments where three wires are required (within each group).

Now, the particular failure was that one complete group was not working anymore:

This is quite strange, since at the end this is still a serial wiring – means, if the wire is broken inbetween the groups, none of the LEDs would work anymore:

This would, by the way, be the same if all LEDs of a group would be broken (which is very unlikely anyway).

Otherwise, if the wire was broken somewhere within the group, only a part of the group should fail:

So the strange thing was that a connection through the LEDs of the broken group must exist, so that the other groups still are still supplied. After some thinking, the only possibility was that one of the LEDs must have a short circuit, and this also explains why the whole group does not work anymore:

Because the broken LED was bridging all LEDs in the group, none of the LEDs in that group worked anymore. At the same time, the other groups still worked since they were still supplied over the short circuit!

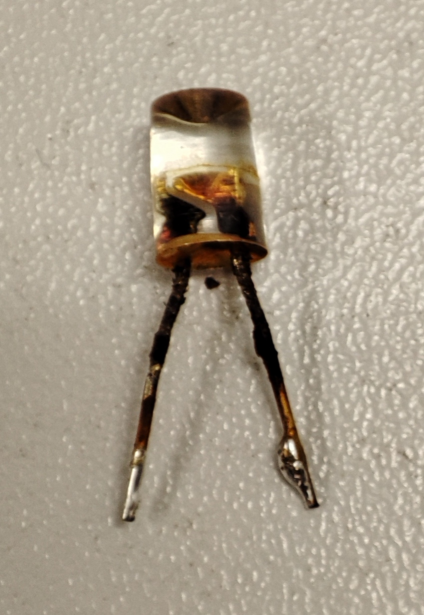
To fix this, I took a bisect approach and desoldered the middle LED in the broken group, then the middle LED of that part of the group where I could still measure the short circuit and so on. Finally I found the following rusty LED which indeed has a short circuit between its pins:

After replacing that LED (and resoldering all the LEDs which I had to remove during my bisect analysis), the whole fairy light works again 🙂

Carrera controller 61511 repair

A few years ago my sons got a Carrera Go race track for Christmas, and unfortunately some time back we observed that the turbo button does not work reliably anymore (which made especially the loop track almost unusable). I found several reports on the Internet that this is a common problem, but I did not find any repair reports yet, so I decided to have a further look into it and see if it is possible to repair this.

First, after opening the controller, I quickly saw what the problem is – the switch is simply broken (in this picture there is also a spring missing which just fell out):

I tried to fix the broken piece by soldering it together again, but this did not work. So the switch was essentially broken and needed a replacement. However it seems that this is a very special part and I did not find any identical replacement for it. However I thought that maybe it is possible to use one of those more common microswitches instead, and decided to give it a try.

First, I pulled out the pcb and removed the defective switch (the pcb is only fixed by two plastic pins, and the switch is not even soldered to the pcb so that it can easily be pulled out after desoldering the two wires):

I then had to adjust the lever by removing a piece of plastic from it, because the new switch is slightly larger. Then, I could do a first check to see if the new switch fits into the controller at all:

The next step was to mark the right hole of the switch on the pcb and drill a mounting hole onto the pcb. A single screw is sufficient because the switch can not move anyways since the case of the controller prevents any further movement when the switch is pressed.

I then mounted the new switch on the pcb with an M2 screw. Also I bent the left connection pin so that it does not conflict with the case anymore (this is the Normally Closed pin which is not required anyway):

When I closed the controller case, I observed that the switch was always pressed and could not be released anymore. This was caused by a certain piece of the top case where the screws are mounted – this conflicted with the lever of the new switch and caused it to be always pressed. So I slightly adjusted that also by removing some of the plastic. Afterwards the controller could be reassembled and the switch fits perfectly inside the controller:

And, a final test shows that the switch is working properly 🙂