The next step is to create a data model according to our requirements. The data model is implemented in the Model project and will provide an API to be used in other layers (such as the User Interface Layer) to create, read, update, and delete data.
When creating a data model in ADF, we will come across these terms:
Application Module
The Application Module basically encapsulates the database transaction. It exposes a data model based on View Objects, and it provides methods to rollback or commit the transaction after data has been modified. Sometimes the application module is also said to “encapsulate a specific unit of work”. This is especially true in larger applications which consist of more than one model project – in our case, the Task application would be one unit of work, so we will define an application module for it, but there could be any number of other application modules like one for project management, one for customer relationship management and so forth.
Entity Object
An entity object represents one row of one table in the database.
Association
An association represents a link between two tables in the database (or between two Entity objects). It defines the primary key to foreign key relationship of the tables involved.
View Object
A View Object is a higher level, more UI centric representation of one or more entity objects. A View object can consist of more than one entity object by joining in the data from the various entity objects. In addition, the View Object does not only represent one row in the database, but a collection of rows. As such, it also executes the queries against the database.
View Link
A View Link is basically a link between two View Objects. It can be created based on an Association.
Note that for each of these artifacts, there are usually two representations:
- One is the meta data (also called the definition) which describes how the particular artifact looks like (e.g. in the case of the entity object, on which database table the entity object is mapped)
- The other are the instances of such an object, e.g. in the case of the entity object there could be five instances, representing five different rows in a specific database table).
- Creating an application module as the “container” for the data model
- Creating Entity objects for the database table mapping
- Creating Associations to define the relationships between the tables
- Creating View Objects based on the corresponding entity objects
- Creating View Links to define the links between the View Objects
Creating the Application Module
The Application Module is the container for the data model. To create the application module, select the “Model” project in Project tree in JDeveloper and select “New => Application Module” from the context menu. Since we have not yet configured the BC4J subsystem, the following screen appears:
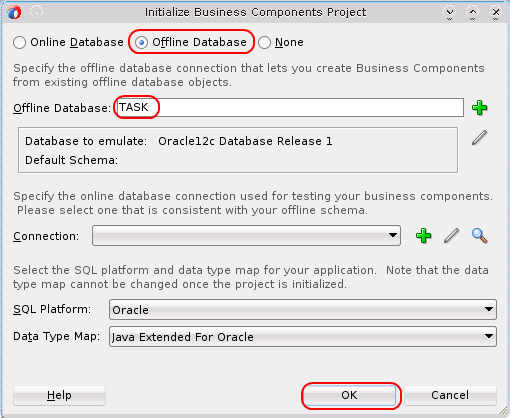
Here, we can configure the data source to use for the application module. This can be either “Online Database” which allows to browse an existing database schema and create entity objects based on existing tables, “Offline Database” which allows to create a file-based representation of a database schema (which is useful since it allows to maintain the schema definition through a version control system), or “None” which can be used to specify a non database based application module, e.g. to access web services. Since we are creating a new application, lets choose “Offline Database”, and we set a name for the offline database, which is “TASK”. We keep all other settings at their defaults and press the “Ok” button. The general setup of the business components layer is now done, and JDeveloper lets us continue with the creation of the application module:
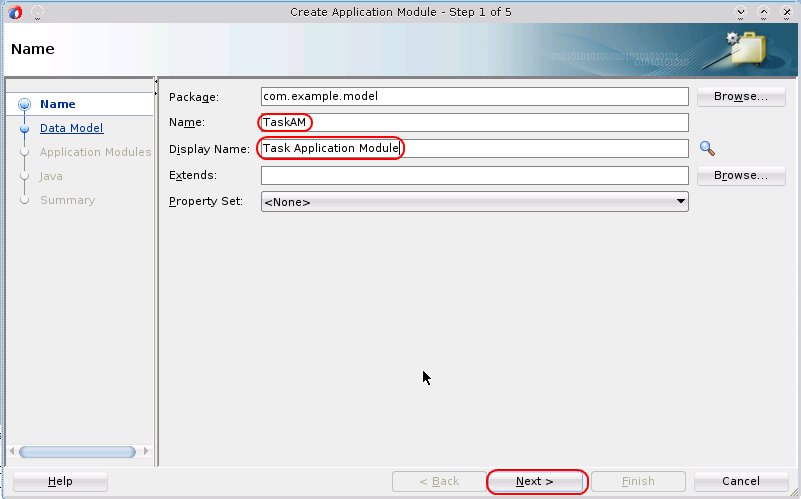
We enter a name for the application module (a useful convention is to add an “AM” suffix to the name) and we can also define a more readable display name. Then, we press “Next” once and then we can press “Finish” to keep all remaining values at their default. For now, all we want to do is to create the plain application module.
Lets examine what happened in the background. Note: it is usually a good advice to press the “save all” button in JDeveloper once we have finished a complex task like the previous one – otherwise, it might happen that not all files are already written back to the file system. Using git status –untracked-files=all, we see that the following files have been created:
Model/database/TASK/TASK.offlinedb
This is the main configuration file for the offline database which we created during BC4J configuration.
Model/src/com/example/model/Model.jpx
Model/src/com/example/model/ModelBundle.properties
This is a resource bundle which contains the display name which we defined in the dialog above.
Model/src/com/example/model/TaskAM.xml
This file contains the application module meta data for the application module which we just created. Among others, it contains a reference to the resource bundle which defines the display name.
Model/src/com/example/model/common/bc4j.xcfg
This is the Oracle ADF business components main configuration file. It defines the available application modules and their configurations.