JBoss AS is supported in Eclipse indigo until JBoss 5.0. For more recent versions, there exist plugins from the JBoss communitiy. The Eclipse Indigo update site for JBoss tools is available at https://download.jboss.org/jbosstools/updates/development/indigo. When installing software from this site, some different categories are shown to install – I have choosen the first one which is “Abridged JBoss tools 3.3”:
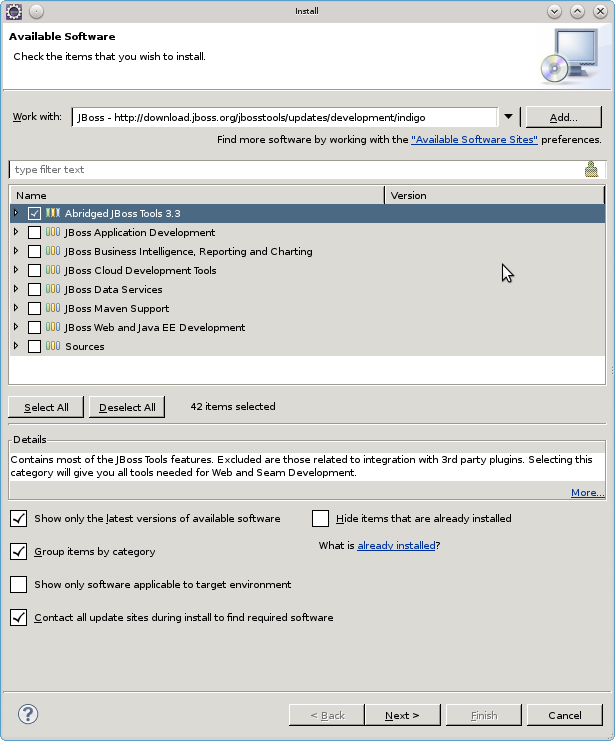
Press “Next >”. In the next dialog, verify the plugin dependencies and press “Next >”.
Note: Due to dependency conflicts with an earlier installation of the EGit plugin, I had to deselect
- JBoss OpenShift tools
- JBoss Tools EGit integration
Review the Items to be installed and press “Next >”. Accept the License agreement and press “Finish”.
Note: In case the “Next >” and “Finish” buttons remain disabled in the License dialog, we might have come across bug https://bugs.eclipse.org/bugs/show_bug.cgi?id=303168 (or similar). Restarting Eclipse did not help in my case – I had to deselect the two conflicting plugins from the very beginning (means, select “Abridged JBoss tools 3.3”, then open the sub components tree and deselect “JBoss OpenShift tools” and “JBoss Tools EGit integration”). Then, the “Finish” button has been enabled after accepting the license.
One annoying thing after installing the JBoss tools is that the “JBoss central” site is automatically opened whenever starting Eclipse. This can be deactivated by selecting the preferences button in the upper right corner of the “JBoss central” tab, which opens the Eclipse preferences dialog and automatically jumps to “JBoss tools” => “JBoss central”. Deselect “Show JBoss Central On Startup” to get rid of the automatically shown tab.
The next step after the plugins have been installed is again to install the application server itself. Download the latest JBoss version from https://www.jboss.org/jbossas/downloads (e.g. jboss-as-7.1.1.Final.tar.gz. Untar the file into any directory (I was using /opt/jboss-as-7.1.1.Final).
Now, define the server runtime in Eclipse. Open “Window => Preferences” and navigate to the “Server => Runtime Environments” node. Press the “Add” button and in the “New Server Environment” dialog, choose “JBoss Community => JBoss 7.1 runtime”. Press the “Next >” button. In the next dialog, enter the path to the directory where you have unpacked the JBoss server earlier:
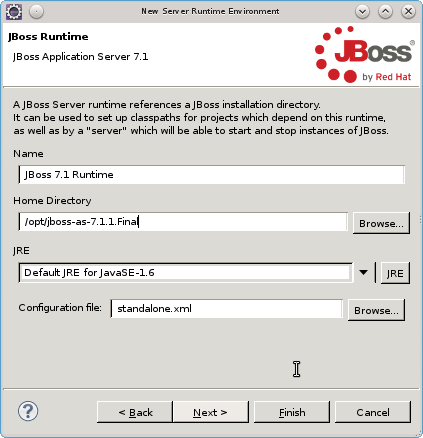
Press “Next >” to configure additional JBoss server properties:
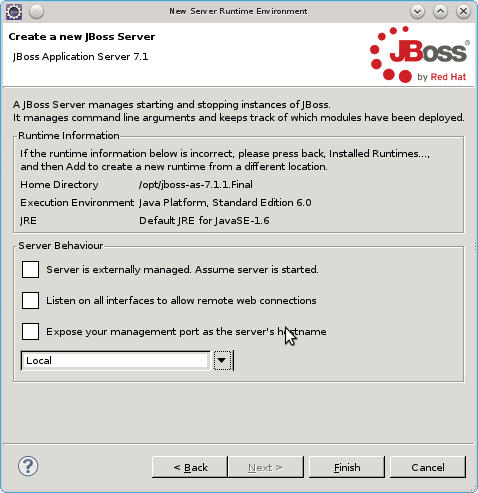
Leave all values at their defaults and press “Finish”.