Year: 2021

LED fairy lights repair

Today I had a fairy light with 200 LEDs in the lab, where some of the LEDs did not work anymore. So the first thing was to find out how the LEDs are wired – I saw that throughout the whole fairy lights, sometimes there were two wires in parallel and sometimes there were three wires. I checked how they are connected, and found that the LEDs are wired in a combination of serial and parallel connections:

There are 10 groups of LEDs, and all the groups are wired serial one after the other. In each group, there are 20 LEDs which are connected parallel. This also makes it clear why there are segments where only two wires are required (the connections between each of the groups) and segments where three wires are required (within each group).

Now, the particular failure was that one complete group was not working anymore:

This is quite strange, since at the end this is still a serial wiring – means, if the wire is broken inbetween the groups, none of the LEDs would work anymore:

This would, by the way, be the same if all LEDs of a group would be broken (which is very unlikely anyway).

Otherwise, if the wire was broken somewhere within the group, only a part of the group should fail:

So the strange thing was that a connection through the LEDs of the broken group must exist, so that the other groups still are still supplied. After some thinking, the only possibility was that one of the LEDs must have a short circuit, and this also explains why the whole group does not work anymore:

Because the broken LED was bridging all LEDs in the group, none of the LEDs in that group worked anymore. At the same time, the other groups still worked since they were still supplied over the short circuit!

To fix this, I took a bisect approach and desoldered the middle LED in the broken group, then the middle LED of that part of the group where I could still measure the short circuit and so on. Finally I found the following rusty LED which indeed has a short circuit between its pins:

After replacing that LED (and resoldering all the LEDs which I had to remove during my bisect analysis), the whole fairy light works again 🙂

Carrera controller 61511 repair

A few years ago my sons got a Carrera Go race track for Christmas, and unfortunately some time back we observed that the turbo button does not work reliably anymore (which made especially the loop track almost unusable). I found several reports on the Internet that this is a common problem, but I did not find any repair reports yet, so I decided to have a further look into it and see if it is possible to repair this.

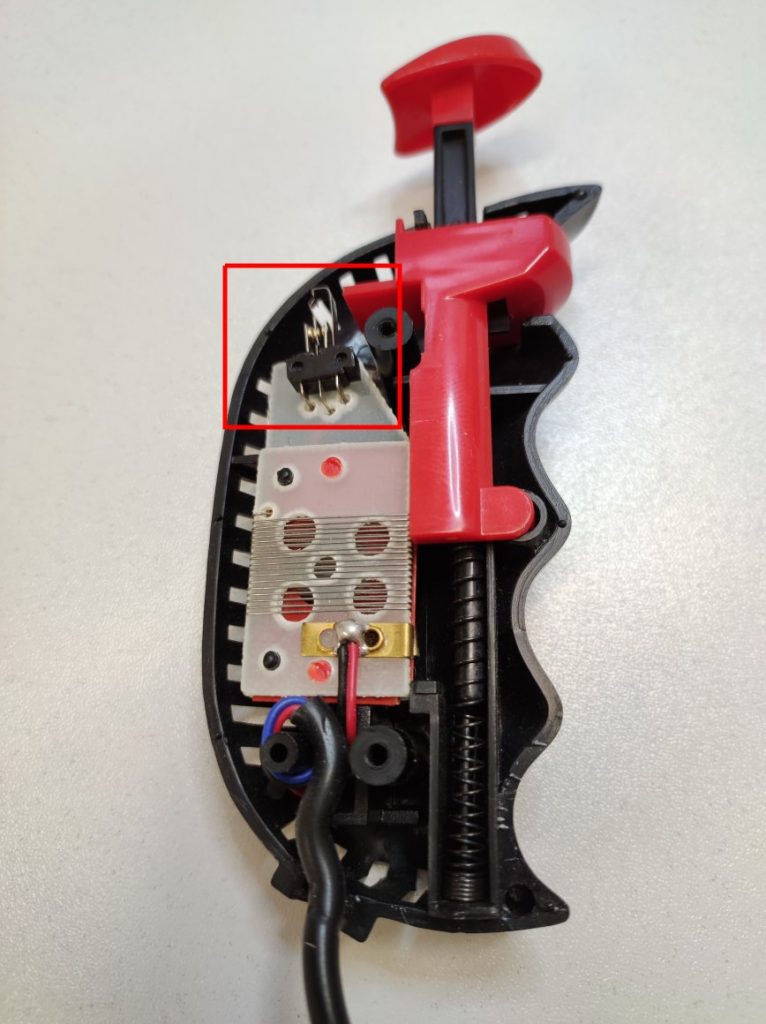
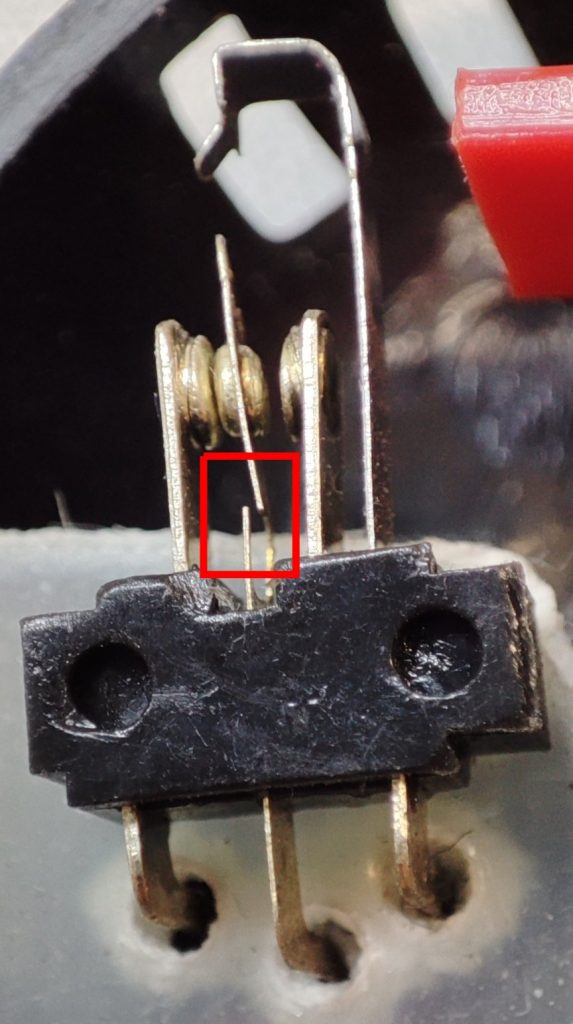
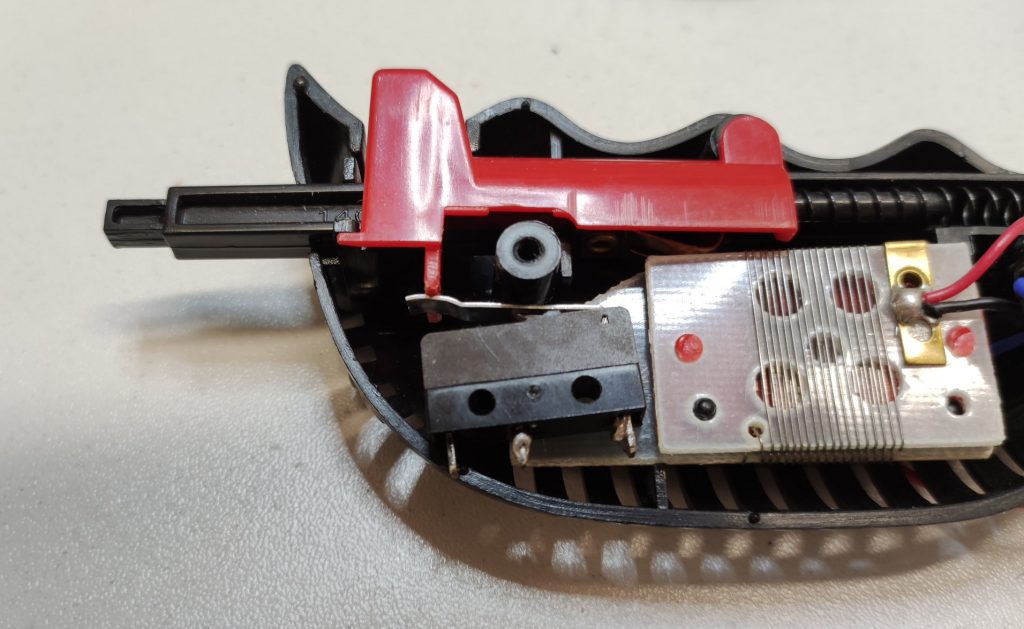
First, after opening the controller, I quickly saw what the problem is – the switch is simply broken (in this picture there is also a spring missing which just fell out):

I tried to fix the broken piece by soldering it together again, but this did not work. So the switch was essentially broken and needed a replacement. However it seems that this is a very special part and I did not find any identical replacement for it. However I thought that maybe it is possible to use one of those more common microswitches instead, and decided to give it a try.

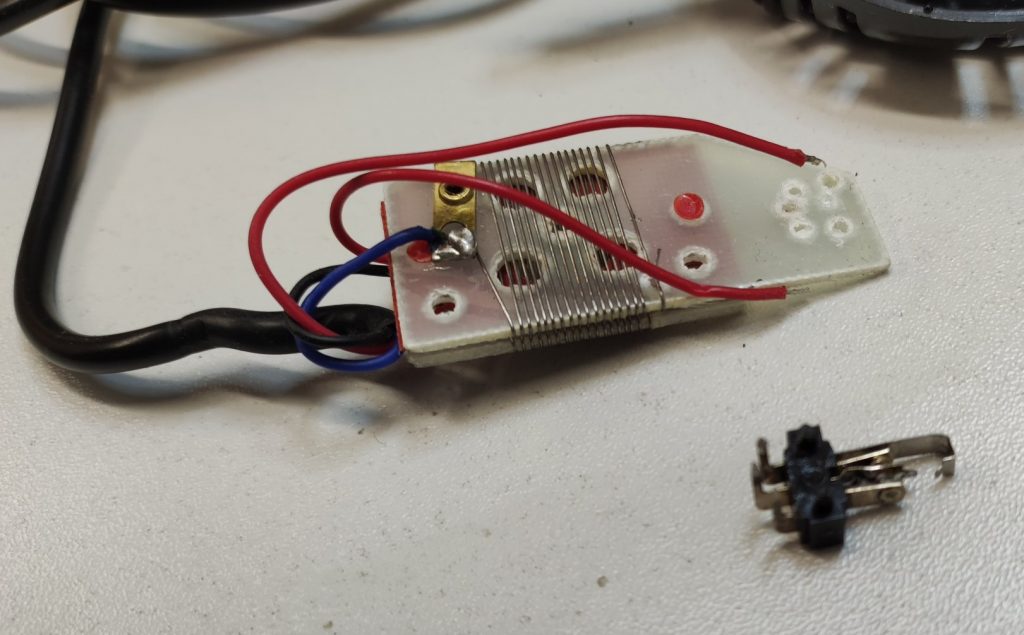
First, I pulled out the pcb and removed the defective switch (the pcb is only fixed by two plastic pins, and the switch is not even soldered to the pcb so that it can easily be pulled out after desoldering the two wires):

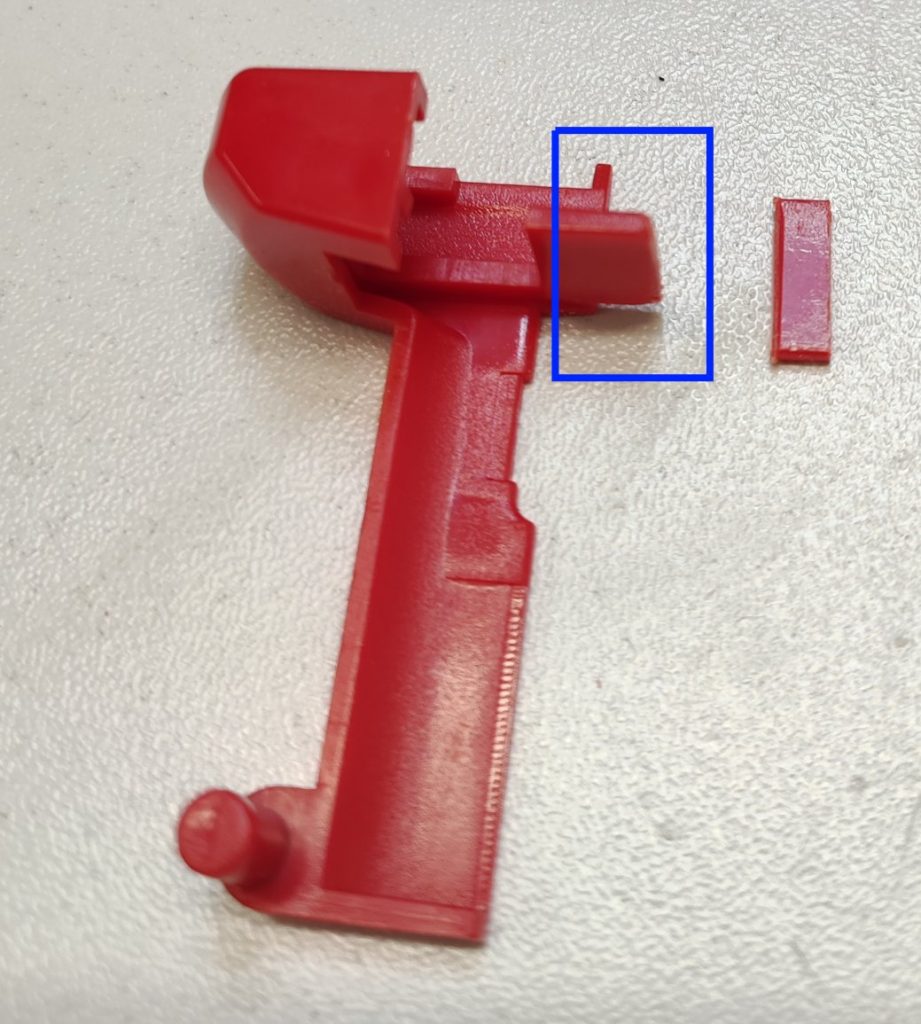
I then had to adjust the lever by removing a piece of plastic from it, because the new switch is slightly larger. Then, I could do a first check to see if the new switch fits into the controller at all:

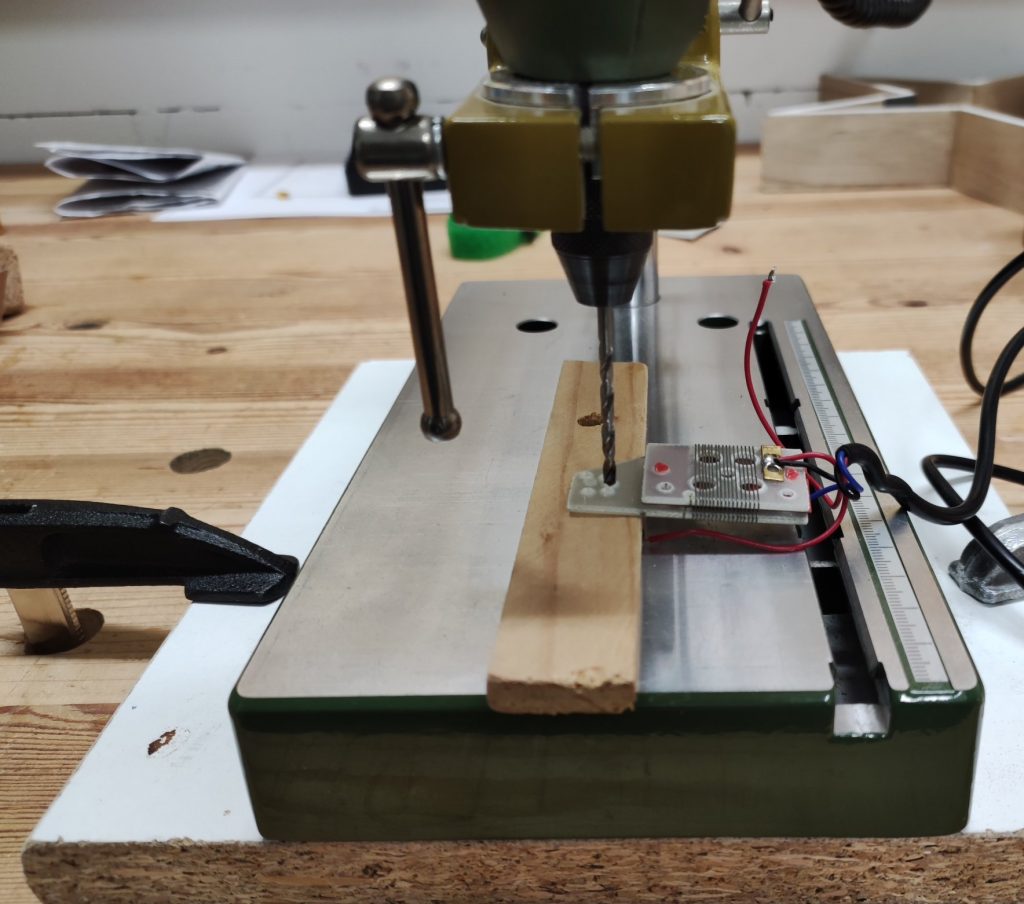
The next step was to mark the right hole of the switch on the pcb and drill a mounting hole onto the pcb. A single screw is sufficient because the switch can not move anyways since the case of the controller prevents any further movement when the switch is pressed.

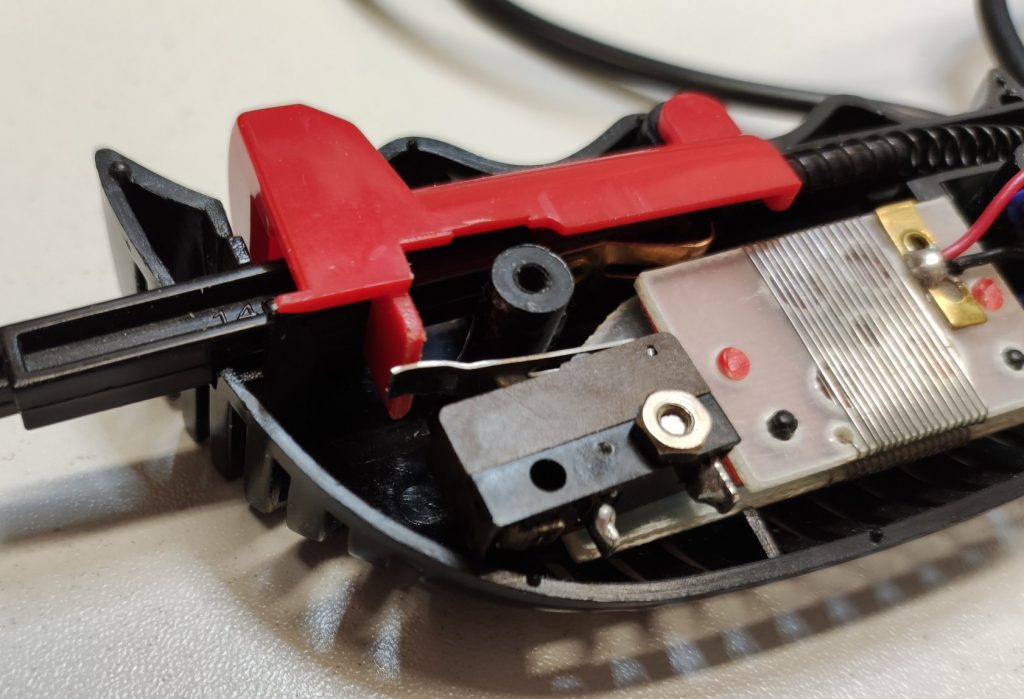
I then mounted the new switch on the pcb with an M2 screw. Also I bent the left connection pin so that it does not conflict with the case anymore (this is the Normally Closed pin which is not required anyway):

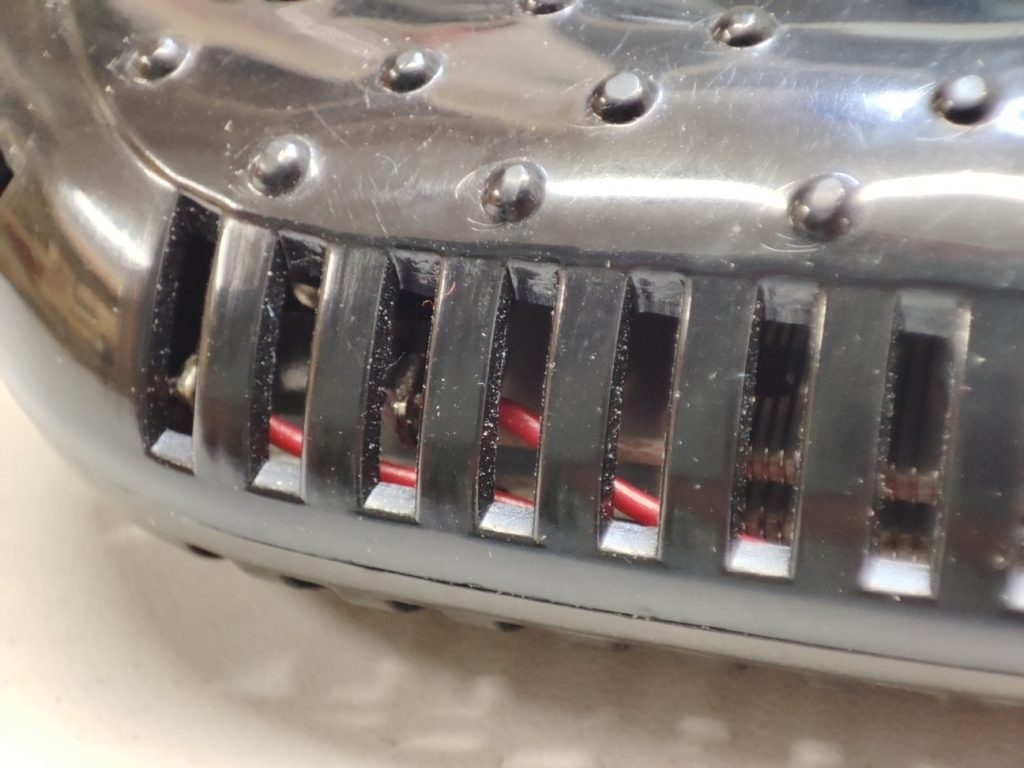
When I closed the controller case, I observed that the switch was always pressed and could not be released anymore. This was caused by a certain piece of the top case where the screws are mounted – this conflicted with the lever of the new switch and caused it to be always pressed. So I slightly adjusted that also by removing some of the plastic. Afterwards the controller could be reassembled and the switch fits perfectly inside the controller:

And, a final test shows that the switch is working properly 🙂

Bad network performance after suspend/resume

I am observing several issues with suspend/resume on my Lenovo Thinkpad L15 G2 (Intel) running Ubuntu 21.04 (currently with kernel 5.11.0-25). One of these issues is that, after the machine wakes up from suspend, the wired network speed was very slow. I used the Vodafone speed check (speedtest.vodafone.de) which indeed showed only a download rate between 2 and 4 MBit/sec. (which really should be > 300 MBit/sec). In this article I describe some of the steps I took to further track this down.

First of all, I made sure that the issue is really reproducible in a simple scenario. And indeed, after reboot the network speed was fine until I did a suspend/resume cycle. After wakeup, the network speed was bad, and the only immediate solution was to reboot, which fixed the network speed until after the next wakeup.

In the next step, I tried bringing the network down and up again. For that, we first need to find out the interface name of the wired network device:

$ ip link show
1: lo: <LOOPBACK,UP,LOWER_UP> mtu 65536 qdisc noqueue state UNKNOWN mode DEFAULT group default qlen 1000
    link/loopback 00:00:00:00:00:00 brd 00:00:00:00:00:00
2: enp0s31f6: <BROADCAST,MULTICAST,UP,LOWER_UP> mtu 1500 qdisc fq_codel state UP mode DEFAULT group default qlen 1000
    link/ether 38:f3:ab:48:8e:2b brd ff:ff:ff:ff:ff:ff
3: wlp9s0: <BROADCAST,MULTICAST,UP,LOWER_UP> mtu 1500 qdisc noqueue state UP mode DORMANT group default qlen 1000
    link/ether c0:3c:59:29:40:5f brd ff:ff:ff:ff:ff:ff

Here enp0s31f6 is the wired LAN interface. Now we can bounce the network interface (note that this requires root access):

# ip link set dev enp0s31f6 down ; ip link set dev enp0s31f6 up

However, this did not fix the issue. The network speed was still slow.

The next try was to reload the module which contains the device driver for the network device. In order to do this, I first had to check which network controller is actually used in the laptop – a simply way is to search the list of PCI devices:

# lspci | grep -i eth
00:1f.6 Ethernet controller: Intel Corporation Ethernet Connection (13) I219-V (rev 20)

So, the network controller is an Intel I219-V. A quick google search (“Intel I219-V linux driver”) revealed that the kernel module is called e1000e. Alternatively, the hwinfo command can be used which directly shows the driver which is used for a particular device:

# hwinfo
...
88: None 00.0: 10701 Ethernet
  [Created at net.126]
  Unique ID: 23b5.ndpeucax6V1
  Parent ID: AhzA.zr6+Yth08U0
  SysFS ID: /class/net/enp0s31f6
  SysFS Device Link: /devices/pci0000:00/0000:00:1f.6
  Hardware Class: network interface
  Model: "Ethernet network interface"
  Driver: "e1000e"
  Driver Modules: "e1000e"
  Device File: enp0s31f6
  HW Address: 38:f3:ab:48:8e:2b
  Permanent HW Address: 38:f3:ab:48:8e:2b
  Link detected: yes
  Config Status: cfg=new, avail=yes, need=no, active=unknown
  Attached to: #34 (Ethernet controller)

Now I was able to reload the module:

# lsmod | grep e1000e
e1000e                270336  0
# rmmod e1000e
# lsmod | grep e1000e
# modprobe e1000e

It is always a good idea to double check if a particular command has the expected result – in this case that the module has really been unloaded.

Unfortunately, this also did not fix the speed issue.

Now, I decided to dig further into the network infrastructure. Since the Vodafone speed test is not always reliable (in fact they had another outage exactly at that day when I was investigating this speed issue), I first have set up a local environment where I could reproduce the issue without relying on any Internet connection. I have another computer available in my local network, so I used iperf to do some performance checks. I started an iperf server on the other node:

otherNode$ iperf -s
------------------------------------------------------------
Server listening on TCP port 5001
TCP window size:  128 KByte (default)
------------------------------------------------------------

and used the iperf client on the laptop to start the measurement:

thinkpad$ iperf -c otherNode
------------------------------------------------------------
Client connecting to otherNode, TCP port 5001
TCP window size:  620 KByte (default)
------------------------------------------------------------
[  3] local 192.168.1.56 port 35608 connected with 192.168.1.57 port 5001
[ ID] Interval       Transfer     Bandwidth
[  3]  0.0-10.0 sec  1.09 GBytes   936 Mbits/sec

This looks really good – and, after suspend/resume, I still got the same values!! This certainly means that the issue is in another layer of the network stack, right? Probably it is related to http only, or probably it is even a browser related issue …

But, no – the explanation was much simpler: by default, iperf -s (the server) is the data sink, and the client (iperf -c) is the side which generates and sends data. Hence, what I was testing with the above commands, was the upload speed and not the download speed (and, the upload speed was still fine even in the aforementioned speed test). So, in order to check the download speed I had to switch the roles of client and server. After starting iperf -s on the laptop and using iperf -c on the other node, I could immediately reproduce the issue. It now became clear that this is most likely related to the network interface / network controller which obviously fails to properly wakeup after the resume.

With that information, i now did another google search and finally found this issue: Massive network problems with I219-V on Thinkpad T14 Gen2 (e1000e). Besides some other issues (which I did NOT see on my machine) there were also mentioned some hibernation related issues. Luckily there was also a workaround posted which indicated that this might be related to the Intel Management Engine Interface, and they suggested to change a particular setting in the MEI:

$ lspci -vvnns 16                      # Check that config 16 is the number of MEI device
00:16.0 Communication controller [0780]: Intel Corporation Tiger Lake-LP Management Engine Interface [8086:a0e0] (rev 20)
	Subsystem: Lenovo Tiger Lake-LP Management Engine Interface [17aa:508f]
	Control: I/O- Mem+ BusMaster+ SpecCycle- MemWINV- VGASnoop- ParErr- Stepping- SERR- FastB2B- DisINTx+
	Status: Cap+ 66MHz- UDF- FastB2B- ParErr- DEVSEL=fast >TAbort- <TAbort- <MAbort- >SERR- <PERR- INTx-
	Latency: 0
	Interrupt: pin A routed to IRQ 147
	IOMMU group: 8
	Region 0: Memory at 601d189000 (64-bit, non-prefetchable) [size=4K]
	Capabilities: <access denied>
	Kernel driver in use: mei_me
	Kernel modules: mei_me

# echo on > /sys/bus/pci/devices/0000\:00\:16.0/power/control

And, indeed – this setting fixed the issue! So by setting the “power/control” property to “on” in the MEI, the issue was gone – the network speed is now still fine after suspend and wakeup.

Screen capturing in Wayland on Ubuntu 21.04

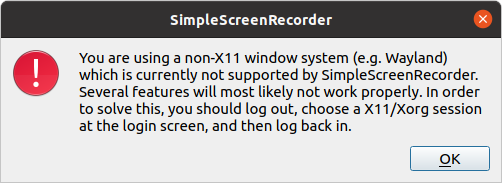
Ubuntu 21.04 has changed the graphics system from the Xorg server to the Wayland server. At first glance, this seems to work well – I had not even recognized this until I wanted to do a screen recording using SimpleScreenRecorder:

When I tried to create a screenshot of the above dialog using Shutter, the whole desktop was filled with this funny pattern:

So, it seems that especially screenshot and sreen recording applications still have their issues with the Wayland server. Before going back to Xorg as suggested by SimpleScreenSaver, I tried some alternative applications which reportedly already work with Wayland:

Kazam

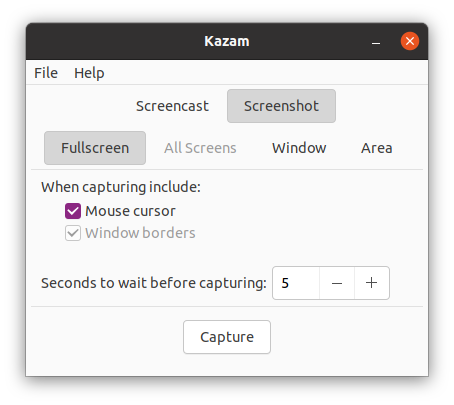
Kazam is available in the universe repository. Hence installation with apt install kazam is straightforward. It looks less feature rich as SimpleScreenSaver though:

Unfortunately the application crashed several times while creating a screenshot from an area. Other options like “Fullscreen” did not work either, so I was not able to test it further.

Kooha

Kooha is relatively new, and there is no package available in the Ubuntu repository yet. So it needs to be built from source. meson and ninja are required for the build, and also a couple of build dependencies need to be satisfied, in particular gettext, libglib2.0-dev and appstream-util. Then, the application can be built using

$ git clone https://github.com/SeaDve/Kooha.git
$ cd Kooha
$ meson builddir --prefix=/usr/local
$ ninja -C builddir install

Unfortunately, running the application then terminates with an error which indicates that it requires Gtk 4.0 (Ubuntu is still on 3.38):

Traceback (most recent call last):
  File "/usr/local/bin/kooha", line 44, in <module>
    from kooha import main
  File "/usr/local/share/kooha/kooha/main.py", line 22, in <module>
    gi.require_version('Gtk', '4.0')
  File "/usr/lib/python3/dist-packages/gi/__init__.py", line 129, in require_version
    raise ValueError('Namespace %s not available for version %s' %
ValueError: Namespace Gtk not available for version 4.0

I decided not to track this down further.

OBS Studio

OBS Studio is a very feature rich application aimed especially towards screen recording and streaming. It is available in the universe repository, however this version (26.12) only records a black screen when using the Wayland server. Version 27.0 is available as Snap, and this seems to work well. After installing it with snap install obs-studio, I was able to create a screen recording and play it back with VLC.

However, the application crashes with a segmentation fault when starting it a second time. Removing the configuration files in the user’s snap directory solves this, but then requires to go through the complete setup process again when restarting the application.

Conclusion

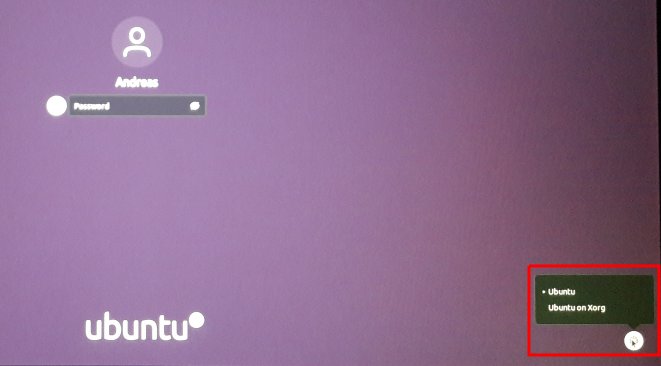
When doing a lot of screen capturing and/or screen recording, it is probably best to stay on Xorg for the time being – this can simply be configured with a button in the lower right corner on the login screen, after selecting the login user:

This selection is persisted across logout/login.
With the Xorg server, both Shutter and SimpleScreenRecorder are working again. Also, OBS Studio does not segfault when relaunching.